
Wi-Fi Protected Setup is a supported generation of certificate applications designed to streamline stable Wi-Fi communities' integration into domestic and small workplaces. Wi-Fi Protected Setup helps advanced customer chat strategies (using button urgency methods or PIN access) to prepare the community to enable them.
As with all Wi-Fi CERTIFIED™ sales, Wi-Fi Protected Setup sales have fashion protection capabilities offered in the form of Wi-Fi Protected Access® methods. Wi-Fi Protected Setup provides consumers with a discreet way to install a Wi-Fi connection that includes security between gadgets or social media. Additional devices may be without problems delivered to the secure Wi-Fi hotspot over time.
While Wi-Fi connects to a wide range of gadgets, a simple, uniform approach to social configuration and security approvals is essential. Wi-Fi clients can choose from a wide range of products and types of understanding that it can be a reliable way to incorporate those gadgets into their community.
Your Wi-Fi router device features an IP Address of 192.168.0.1 or 192.168.1.1 as the default IP Address. This IP Address can help you in setting up your private network and IP Address securely and safely. A website IP Router Login features articles on more topics like this. you could visit to learn more about everything related to the router configuration.
Wi-Fi Protected Setup (WPS) is a function provided by most routers, designed to make the process of connecting to a stable Wi-Fi community from a pc or a different tool easier.
Make sure that an effective router and network tool supports the WPS feature:
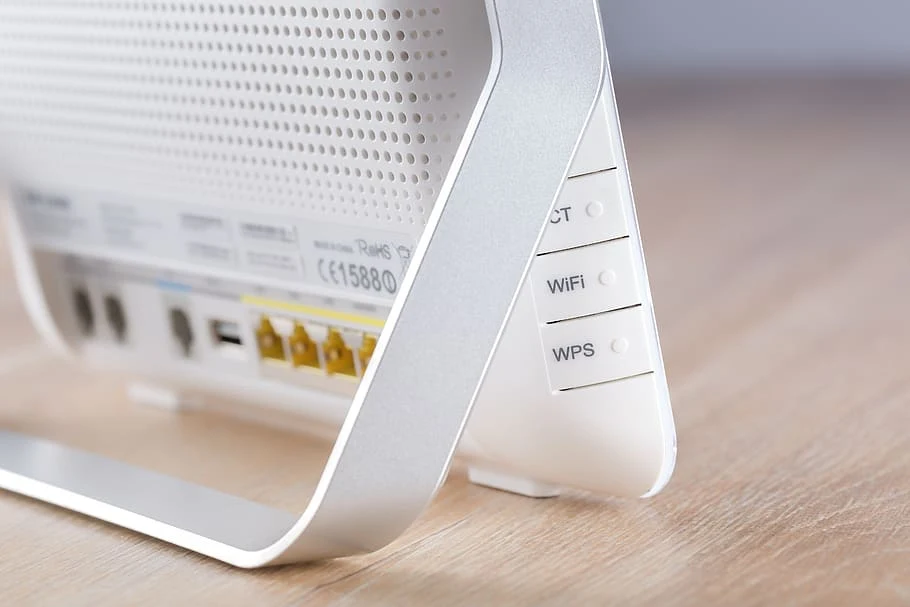
- Check your modem or router to see if it has a WPS button.
- Go to the Network menu of your effective network tool to see if WPS options are available.
Follow these steps to install the WPS (Push Button) connection:
- Using the remote provided, press the HOME button.
- Select Settings.
- Select Network.
- Select Network Set up or Setup Network Connections.
- Select Wireless, Wireless LAN, or Wi-Fi.
- Select WPS (Push Button).
- Select Start for the TV to search for the WPS connection.
- Press the WPS button that is present behind the router to set up the connection. Depending on the router and home configuration, it may take a few minutes to connect. (Note: Most routers have a small bright light when a connection is established.)
- As long as a successful connection ensures that an effective router and tool support the WPS feature.
What can WPS do?
WPS can sometimes simplify the relationship process. Here's how to make a WPS connection:
1. First, press the WPS button of your router to show where the latest gadgets are available. After that, visit your tool and select the community you need to connect with. The device has been linked to the Wi-Fi community by logging in to the public password.
2. You can also have gadgets like Wi-Fi printers or various extensions with their WPS button, which you can use to make fast connections. Connect them to your Wi-Fi community with the help of emergency use of the WPS button on the router and then on those gadgets. You must not enter any other record at any time during this process. The WPS connection machine automatically sends a public password, and those gadgets keep it in mind for use on fate. They can be a great platform to connect with the same community unless you use the WPS button again.
3. The third method involves using an eight-digit PIN. All WPS-enabled routers with a PIN code are robot-generated and cannot be modified with the help of users. You can find this eight-digit PIN on the WPS web page on your router. Some gadgets have a WPS button, but with WPS, they will request that PIN. When you install it, they authenticate themselves and connect to the Wi-Fi community.
4. The fourth and final strategy is in addition to inserting the use of an eight-digit PIN. Some gadgets have a WPS button, but with the help of WPS, they will generate a customer PIN. You can then enter this PIN on your Wi-Fi configuration panels, and the router will use it to install that tool publicly.
While key strategies are speeding up, the latter no longer offer blessings regarding the time it takes to attach gadgets to your Wi-Fi community. You have to type an eight-digit PIN, and typing a public Wi-Fi password is just a bit slow. The fourth way to connect to the Wi-Fi community is slow because you need to enter the routing Wi-Fi configuration section and set the PIN provided with the help of the consumer device. If you need to see what the WPS PIN looks like, this is done via the TP-Link Archer C1200.
While your router issues will appear different, the WPS PIN connection method works the same way.
Where do I get WPS on my router?
Since Wi-Fi routers are the ones that control Wi-Fi connectivity via WPS, they are the most popular types of gadgets that provide the standard level of social security. WPS powers almost all modern routers. For most routers, WPS is automatically enabled. Personalization of WPS is done both with your router's firmware and its user-friendly controls or the use of the WPS button.
At higher speeds, the WPS button is restored to the router and Ethernet ports. Press once, and WPS is enabled and active. You can then join your Wi-Fi gadgets via WPS. You can see where the WPS button appears on the ASUS router.
For different routers, the WPS button is shared with various features. For example, one WPS button per turn on and off Wi-Fi on the TP-Link router below. A brief press on this button turns on or off Wi-Fi. Long press on the same switch, 3 seconds, allows or disables WPS.
Some Wi-Fi routers, such as those made with Linksys, have a WPS button on the back that is easy to access and use, here is a linksys re7000 manual online if you are having issues and need some guidance. If you liked reading this article, be sure to check out other tech-related articles and posts we have on our website.


 at Home)
0 Comments