

Database programming can be an
important step for many developers, and most applications need to interact with
data in some form or another. Python is a programming language used for data analysis, and MySQL is a commonly
used database service.
Python is conquering the world as a
programming language. For a developer, learning how to use this popular
programming language could be vital. Follow these steps to get started with
MySQL and Python.
The standard way for Python to access
databases is through Python DB API. Within this API, there are modules
available for some of the most common database management software, such as
MySQL and Oracle. If your application is a website, be sure to use a vulnerability scanner to check if there are any security risks with this new integration.
Note for Microsoft Visual Studio 2022
users: The 2022 version does not currently support MySQL Server. Microsoft
Visual Studio 2019 was used for this tutorial on a Windows 10 machine.
Step 1. Install MySQL Using the MySQL Installer

The MySQL installer can easily install MySQL products.
This tutorial will focus on MySQL Server 8.0.28, MySQL Workbench 8.0 CE, MySQL
for Visual Studio 1.2.10, MySQl Shell 8.0.28, and Python/Connector 8.0.28.
MySQL Router will not be referenced.
When MySQL Server is installed,
select “Development Computer” unless the machine you are using is going to
function primarily as a server. All other fields should be left at their
default values.

Select strong password encryption to
keep your data safe. MySQL can be hacked by
cryptocurrency miners and other malicious actors. And with the price of Bitcoin, for example, continuing to
rise, it’s essential to take every precaution. Use the legacy authentication
method only if MySQL 8.0 is not supported.

Choose a root password.

You may add a user in the “Accounts
and Roles” section of the installer by selecting “add user” and then creating a
username and password. For this tutorial, “admin” is used as the username. Use
a secure password — “adminpassword” was selected for this tutorial.
Additional users aren’t required to
continue installation.

Default options were chosen for
Windows Service. You may deselect the option “Start the MySQL Server at System
Startup” if necessary.

Apply the configuration changes to
the MySQL Server installer.

The applications pictured below
should all have been installed.

MySQL Shell is a code editor for
MySQL. There, you can run queries, perform updates, and conduct administrative
operations.
Try MYSQL Shell by connecting to the
database, using the below command to connect to root, and entering the password
when prompted.
\connect root@localhost:3306

Step 2. Install Python
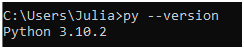
Check if Python is installed on your
machine by opening the command prompt and entering the command below.
py --version
If Python is not found, download it
from the Python website. Check the version once
installed.
You may need to add a PATH system
variable in Windows to use the command “py.” If an older version of Python is
installed, the command used is “python.”
Anaconda will not be used in this
tutorial, but it is an excellent free and open-source tool that provides
powerful data science packages for Python and R.
Installing Anaconda is recommended if you will be working with data science and
machine learning.
If you’re new to using Python, try
some exercises to start developing your knowledge.

Step 3. Launch Your MySQL Workbench
Set up a new connection in MySQL
Workbench. Select the username chosen during the server installation.
Alternatively, you may create a
connection with the root account and password.

Once the connection is established,
select the connection named “tutorial.”

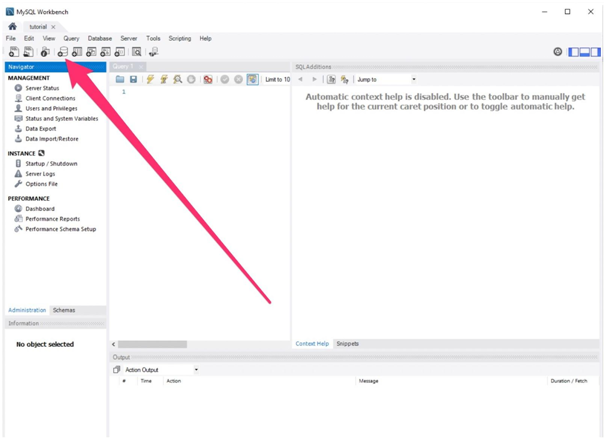
After making your selection, create a
new schema by selecting the fourth icon on the top row.
Name the schema “tutorial” and leave
all other options as their default values.

Select “Apply” to review the script
that is being executed.

Now that the schema has been added,
create a new table in the “tutorial” schema by selecting the fifth icon on the
top row. Notice that, on the left pane, “schemas” is now active instead of the “Administration”
tab.
The below column names, data types,
and categories were selected. The column “id_item” is an INT. Select PK
(primary key), NN (not null), and AI (auto increment).
The variable “item_name” is of datatype VARCHAR(45), the max length is specified as 45 characters, and the NN box is ticked.
Choose “item_inventory” as the next column name with a datatype of DECIMAL(10,1), meaning that 10 digits are stored but only one is displayed. No other options should be ticked.
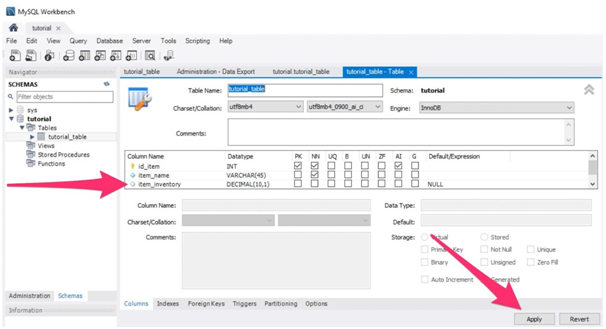
Click apply and review the SQL script
that is run with these changes.

In Workbench 8.0, you can access the table data by right-clicking the table name in the “Schema” pane and clicking “Select Rows - Limit 1000.”

Add some test data to the table to access later in Python.

The command prompt window can also be
used to create databases and tables. However, the GUI is often easier to work
with for beginners.
Use the below command to access MySQL
from the command prompt window.
mysql -u admin -p

Enter the password when prompted.
You may need to add a PATH system variable in Windows 10 to use the command “mysql.” To set this up, go to “View advanced system settings” on the Control Panel. Select the “Advanced” tab and select “Environment variables.”

Select the row with the variable “PATH” and then select “Edit.”

Add a “New” path to “C:\Program Files\MySQL Server 8.0\bin.”

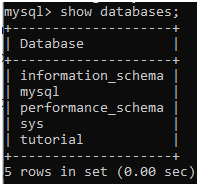
Use the below command to show all
available databases.
show databases;
The newly created schema should now be available within the database.
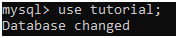
Select the new database by using the
below command.
use {SCHEMA name};
use tutorial;
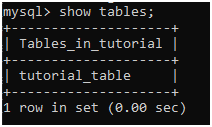
Then, use the below command to see
all tables in the selected database.
show tables;
Step 4. Install the MySQL Connector Package
In the Command Prompt window, use the
below command to install the mysql-connector-python package.
pip install mysql-connector-python

If the command “pip” is not
available, ensure that the path “C:\Users\{Your Username}\AppData\Local\Programs\Python\Python310\Scripts”
is set as an environment variable.
If this is the incorrect path for your installation, search for the pip application in the AppData folder and copy the full path to that folder.

Step 5. Use a Code Editor to Integrate a MySQL Database on a Python Application
You’re ready to connect to the MySQL
database in Python. Open Microsoft Visual Studio 2019 or your code editor of
choice. Use the below Python code to print all the data in the created tutorial
table:
import
mysql.connector
from
mysql.connector import Error
#
try to connect to the created database
try:
connection =
mysql.connector.connect(host='localhost',
database='tutorial',
user='admin',
password='adminpassword')
if connection.is_connected():
database_info =
connection.get_server_info()
print("Connected to MySQL Server
version ", database_info)
cursor = connection.cursor()
cursor.execute("select
database();")
record = cursor.fetchone()
print("Connected to database:
", record)
except
Error as e:
print("Error while connecting to
MySQL", e)
#
declare the cursor object
cursor
= connection.cursor()
#
define the query by selecting the table name
query
= "SELECT * FROM tutorial_table"
#
get records from the table by executing the query
cursor.execute(query)
result
= cursor.fetchall()
#
print column headers
num_fields
= len(cursor.description)
field_names
= [i[0] for i in cursor.description]
print(field_names)
#
print values in each row
for
row in result:
print(row)
If the below text is displayed in the
console, the Python application has successfully connected to MySQL:
Connected to MySQL Server version 8.0.28
Connected to database:
('tutorial',)
['id_item', 'item_name', 'item_inventory']
(1, 'apples', Decimal('5.5'))
(2, 'bananas', Decimal('10.0'))
(3, 'spinach', Decimal('12.5'))
(4, 'carrots', Decimal('8.3'))
Press any key to continue . . .
Step 6. Alter Table Data in Python
Table data can be accessed using
Python. The methods are similar to the MySQL scripting language. For example,
you may use the below code snippet to add a column in Python:
# alter the student
table by adding one more column
alter_statement = "ALTER TABLE
tutorial_table ADD item_UOM VARCHAR(10);"
# execute the SQL ALTER statement
cursor.execute(alter_statement)
# verify the new schema by issuing a
DESCRIBE statement
desc_statement = "DESC tutorial_table"
# Execute the SQL SELECT query
cursor.execute(desc_statement)
# Fetch the updated row
columns = cursor.fetchall()
Here is the console output when the
column is added:
Connected to MySQL Server version 8.0.28
Connected to database:
('tutorial',)
['id_item', 'item_name', 'item_inventory', 'item_UOM']
(1, 'apples', Decimal('5.5'), None)
(2, 'bananas', Decimal('10.0'), None)
(3, 'spinach', Decimal('12.5'), None)
(4, 'carrots', Decimal('8.3'), None)
Similarly, values in the table can be
edited using the UPDATE command.
Conclusion
Integrating a MySQL database with a
Python application can take a bit of work your first time. If you’re already a
savvy MySQL user, the commands in Python are the same, but there’s an added
layer of abstraction, as a cursor object is used. This can take some getting
used to, but it’s worth it to have access to powerful analytic tools with
Python.


0 Comments